


OUR BLOG

NorCal Big Bucks
It’s been tough for us to get out and explore so far this year. Finances have been a little thin and we both have been ill the last few weeks. [I even tested positive for the virus.] Fortunately, we have had the ability for some shorter day trips near base camp. We have lots to explore in Southern Oregon and Northern California without having to travel too far to do so.

A pair of large mule deer stand on a ridge overlooking the Tule Lake NWR near the boundary of the Lava Beds National Monument.
Bald Eagle perched in a tree inside the Lower Klamath National Wildlife Refuge.
It’s been tough for us to get out and explore so far this year. Finances have been a little thin and we both have been ill the last few weeks. [I even tested positive for the virus.] Fortunately, we have had the ability for some shorter day trips near base camp. We have lots to explore in Southern Oregon and Northern California without having to travel too far to do so.
Felling better, I ventured out on a Sunday drive. Visiting one of my favorite locations this time of the year, the Tule Lake and Lower Klamath Wildlife Refuges.
Once again, and probably for a while, there is little water in the refuges due to the ongoing drought. But I did start off my adventure near what little water remains at the NWR’s - the southeast side of the Tule Lake NWR.
On this trip, water-based wildlife remained scarce. By this time of the year and through the month of March, the area is usually teeming with waterfowl and raptors by now. The refuges hold the largest concentration of wintering Bald Eagles in the lower 48.
This year, it’s anything but typical.
The deer have usually moved out to dryer winter ranges, but to have stayed in the refuges and not migrated.
This past Sunday, I counted:
1 Coyote
11 Bald Eagles
15 Hawks
70 Deer
Seventy deer is a pretty good number and unusual for January. Normally the deer would have moved south into more traditional winter ranges by this time. Of those seventy, half were males with large racks of unshed antlers.

I have never been good at distinguishing the difference between hawk breeds - red tail and rough-legged. So my hawk count is a combined total.
What I did not see was even more astonishing. I did not see large flocks of Speckle Belly Geese, Tundra Swans, Wood Ducks, Merganzer, or Canadian Geese. Just a few scattered duck and geese and one decent group of Snow Geese. Because the waterfowl is not present in large numbers, neither are the preditors.
I finished my near 100-mile journey with a stop at “the old shovel,” an early 1900s model excavator that was used to create the canals of the Klamath Project and wildlife refuges. This old piece of heavy equipment must have some great stories to tell.

BONUS MATERIAL
Additional material such as our Relive videos and Gaia GPS tracks are available to our Patreon Family. For as little as $1/month help us tell the stories of our overlanding adventures and get special videos and our Gaia GPS tracks.
ADDITIONAL PHOTOGRAPHY


Southern Cascade Loop
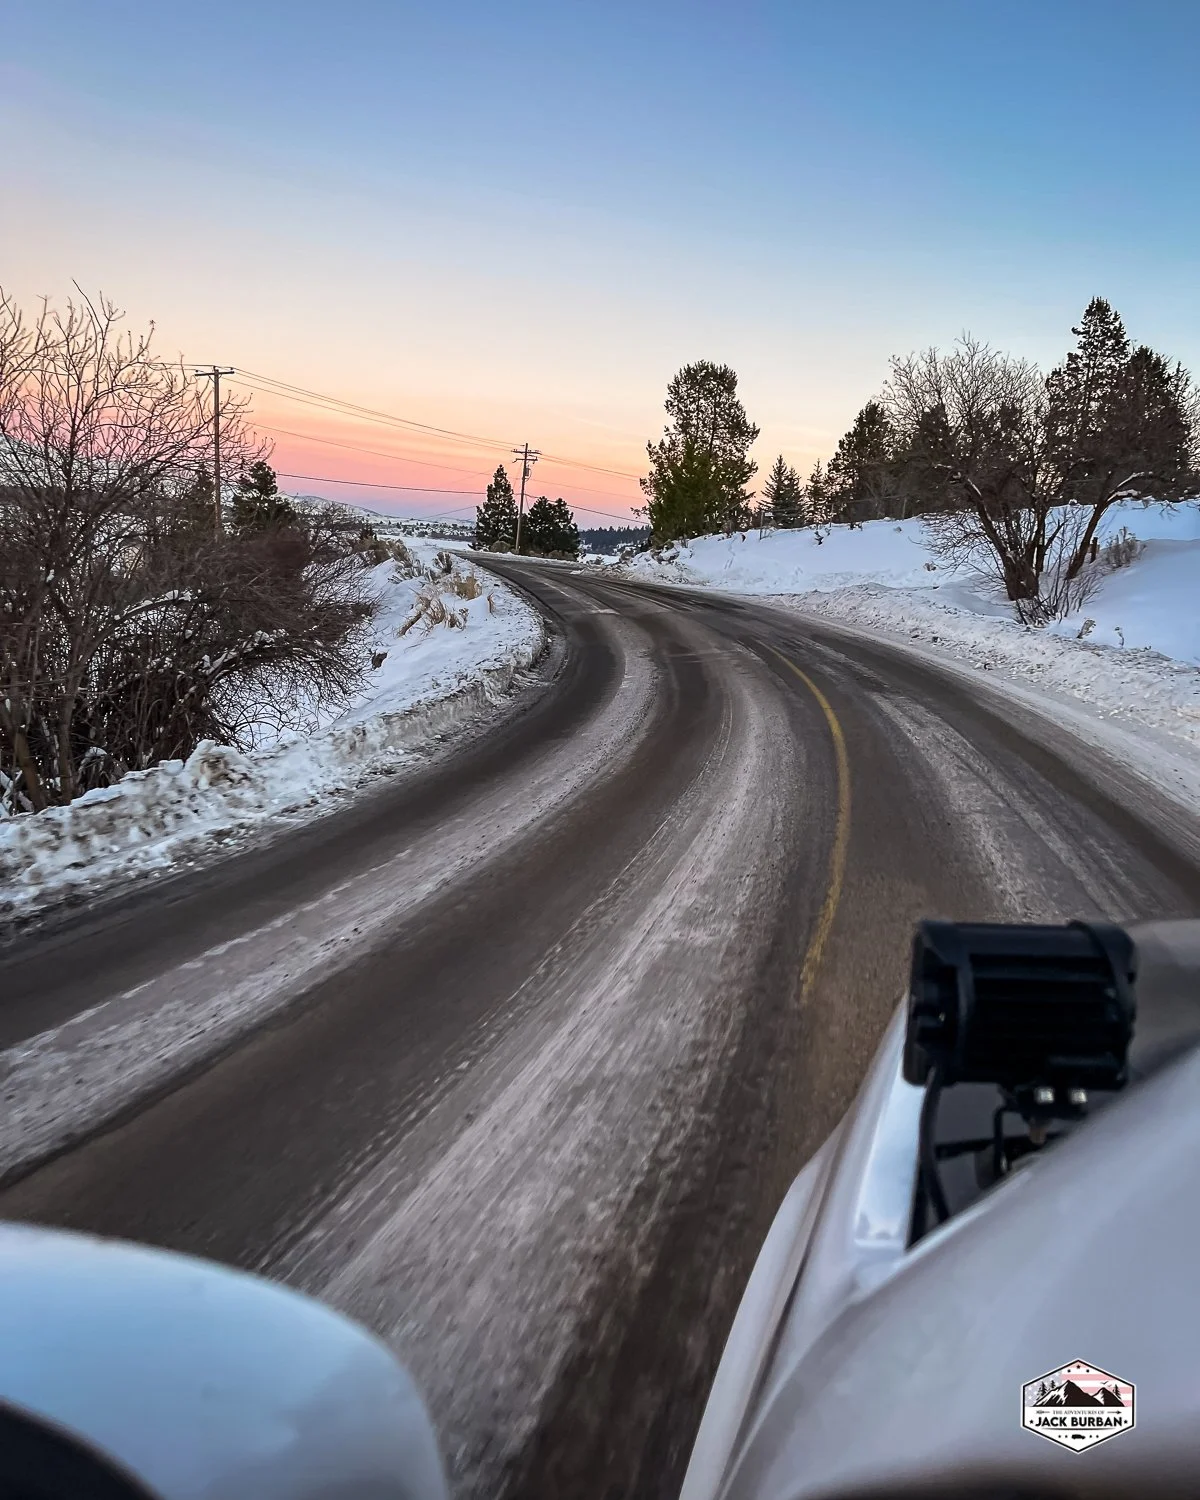
Crystal and I kicked off the new year with some cabin fever - from having been stuck at base camp for far too long. We decided to go out for lunch in Keno, Ore. and take a trip around the Southern Cascades.
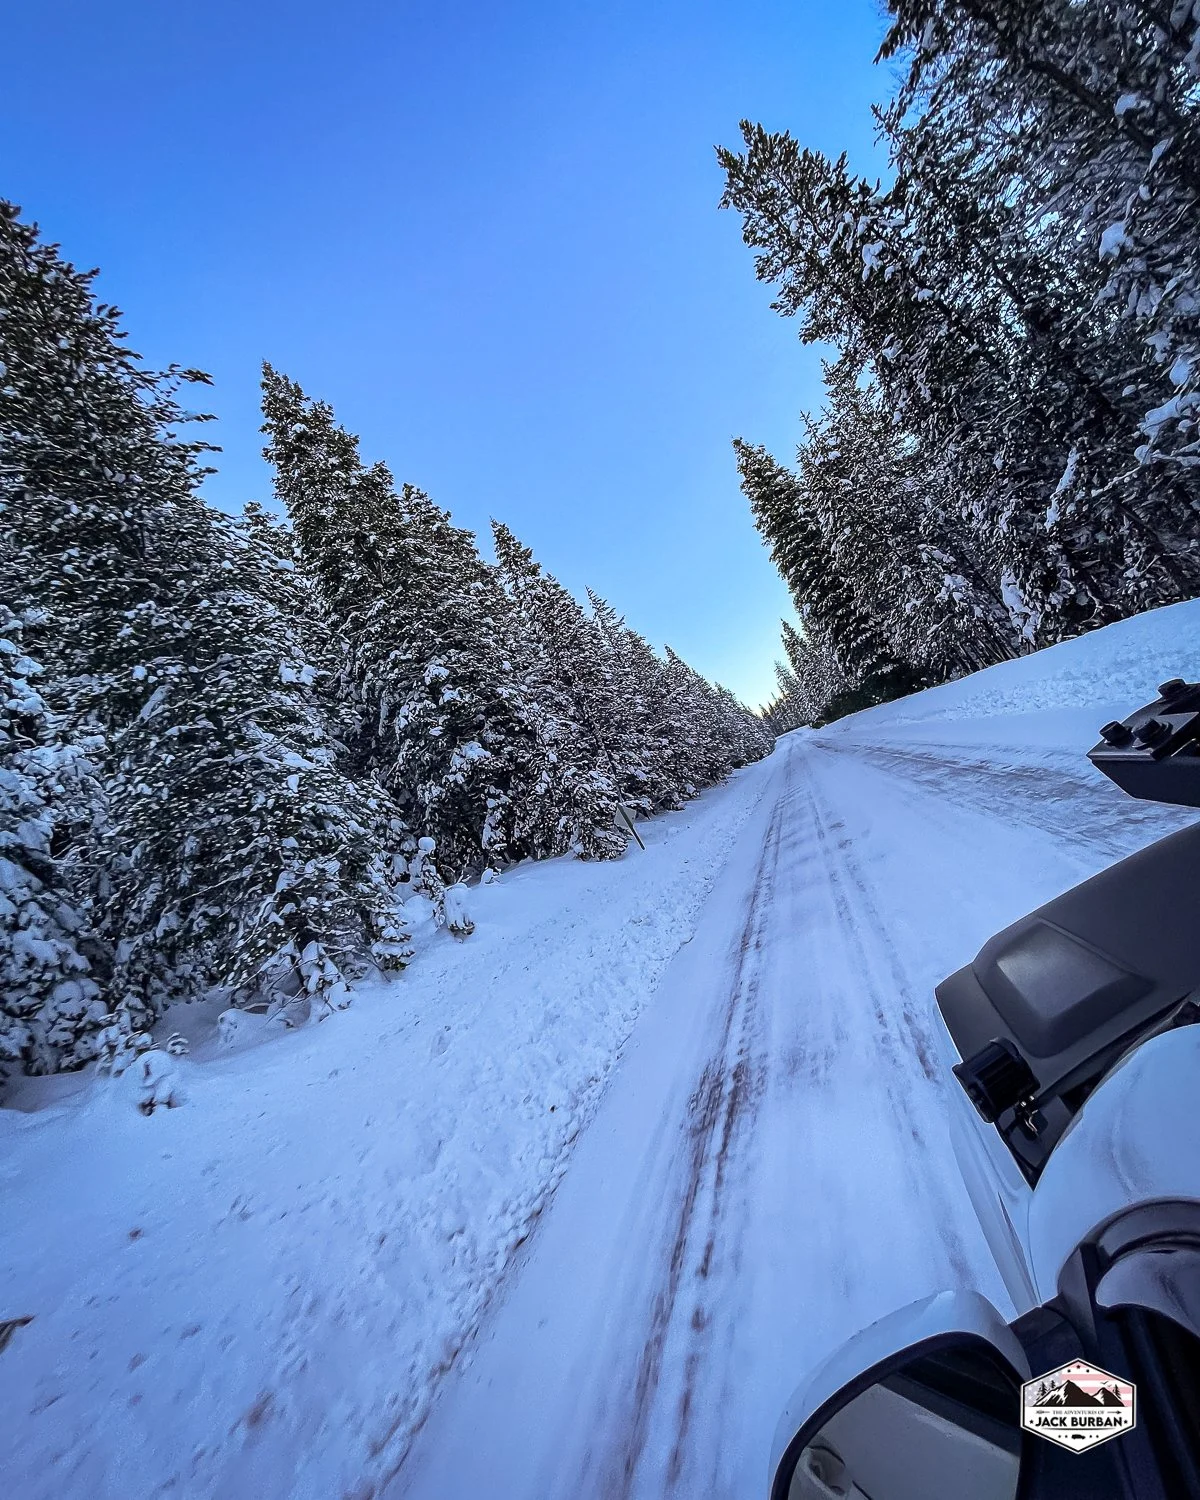
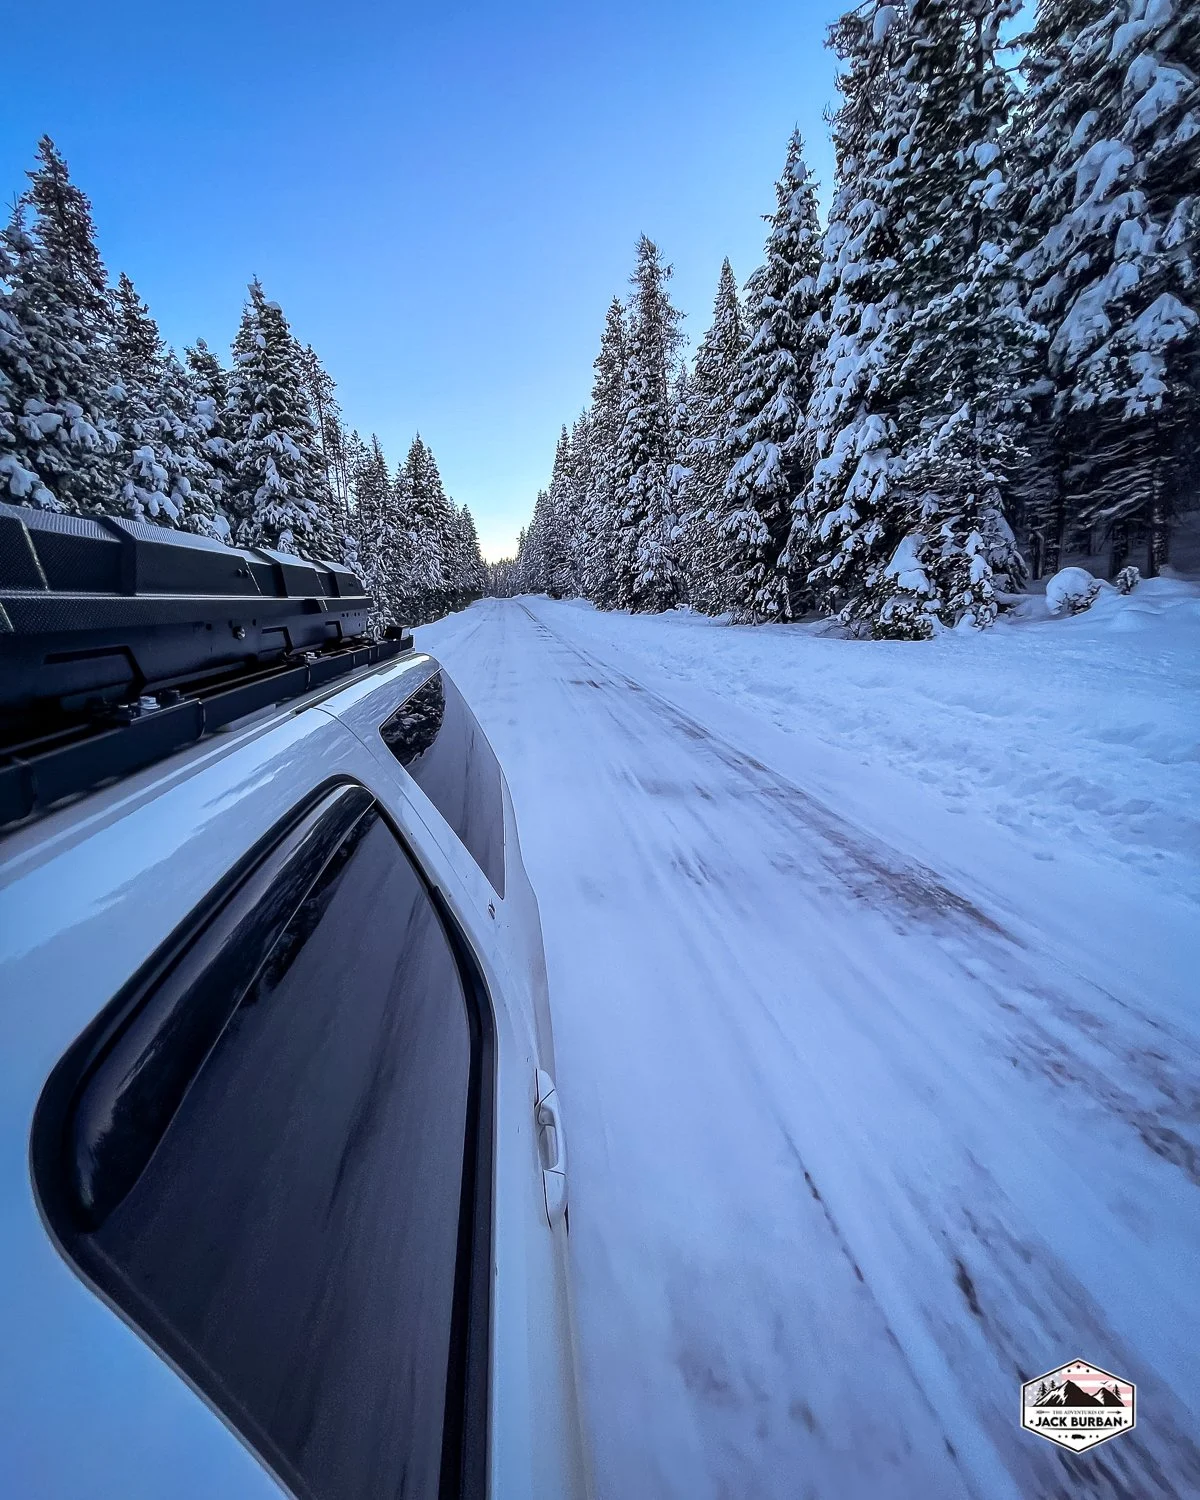
Such winter beauty in the old growth fir forest of the Fremont-Winema National Forest along Clover Creek Road in Klamath County, Oregon.
Crystal and I kicked off the new year with some cabin fever - from having been stuck at base camp for far too long. We decided to go out for lunch in Keno, Ore., and take a trip around the Southern Cascades.
There are only a couple of places to enjoy lunch in Keno. One is the Whoa Tavern and the other is the Keno Store. In our opinion, it’s an easy decision on which one to stop at. For us, it’s the Keno Store with their world-famous jojo's potatoes.
After our mid-afternoon extremely unhealthy lunch, we found ourselves with a few hours of daylight left.
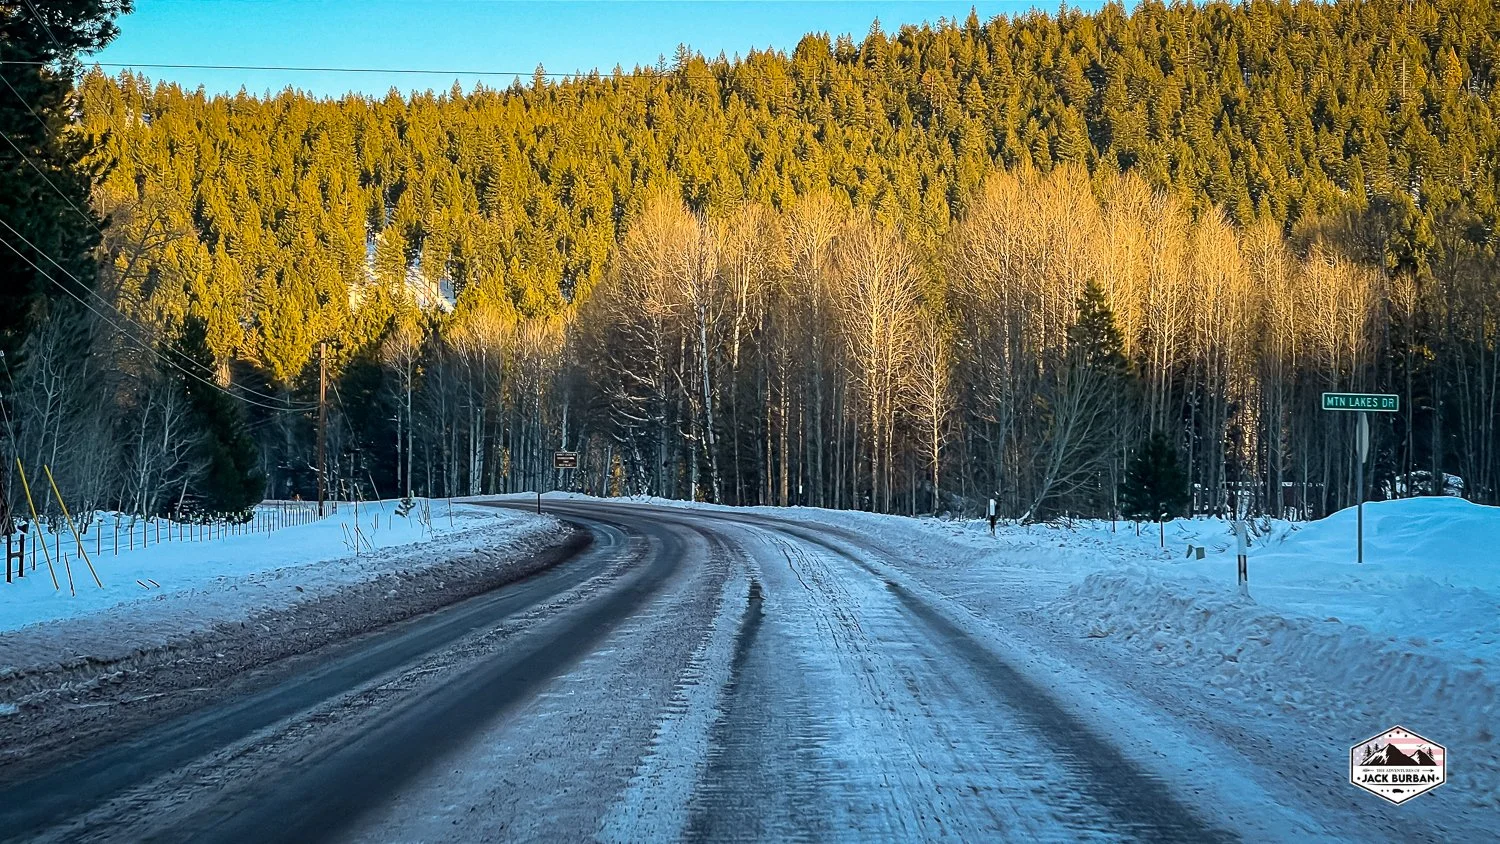
We began on one of our favorite loops in Klamath County that we call the Southern Cascade Loop. It’s one of my personal all-time favorite locations on the planet. From what I know, there is not an official name for this drive, but essentially we drove a 75-mile loop around the Mountain Lakes Wilderness in the Southern Oregon Cascades.
There was a good bit of snow up there in the mountains. At the highest point (5374'), I would estimate about 4-5 feet, maybe more.
About halfway through the loop, we stopped at the Lake of the Woods Resort to check on lake conditions. Although, we did not stay long. Blustery winds were whipping over the lake and through the resort. We could tell that the lake is establishing a nice layer of ice and snow, but it did not appear ready for ice fishing yet.
After leaving the resort, we meandered along on ORE140 back to basecamp.
The trip was enjoyable and fun. It is always good to get out and explore a little on a Sunday afternoon. More snow is expected this week, likely keeping us grounded at base camp.
We are already planning the next adventure.
Where would you like to see us go next?
Additional Material
Additional material such as our Relive videos and Gaia GPS tracks are available to our Patreon Family.
For as little as $1/month you can help us tell the stories of our overlanding adventures and as a thank you, you receive special bonus content with extra videos and our GPS tracks.
Photography


New Years Day Adventures
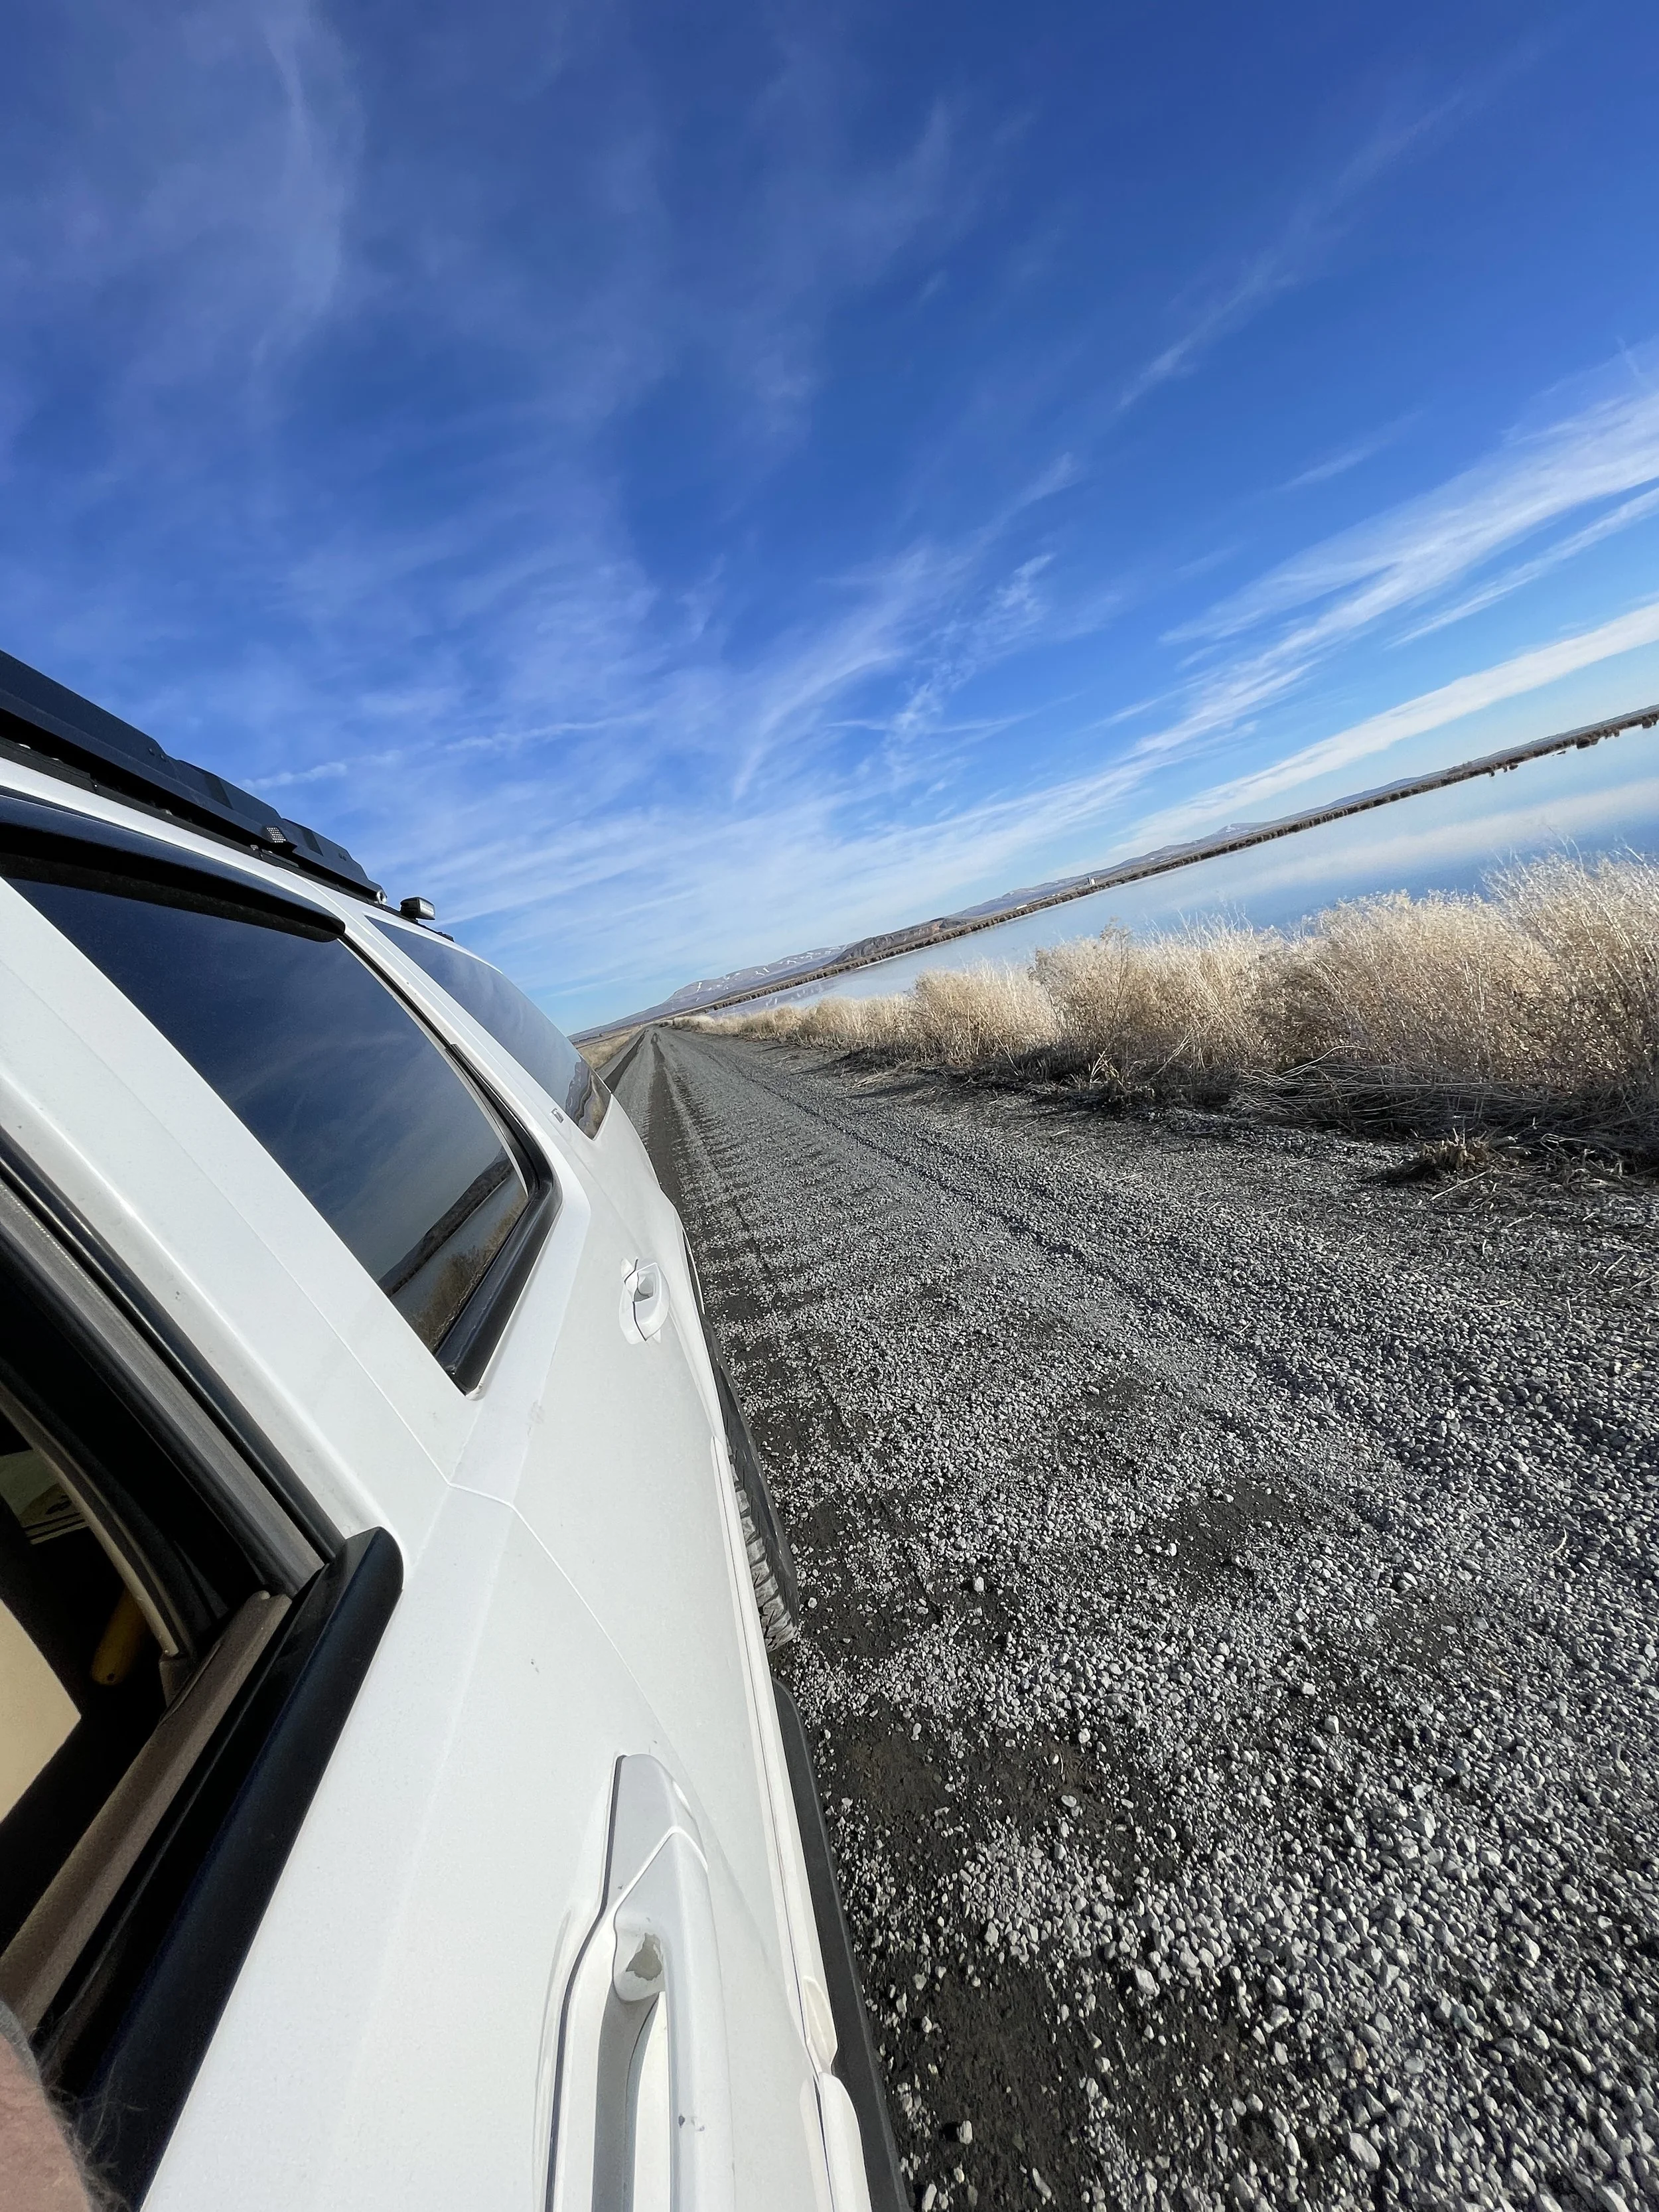
Today, I went on a short adventure. Roughly a 100-mile loop from basecamp to nearby refuges - Lower Klamath NWR and the Tule Lake NWR. I went with the intention of checking on the winter conditions at the refuges and counting the number of wildlife spotted.
Jack at the Peninsula in Northern California.
On New Years Day 2022, I went on a short adventure. Roughly a 100-mile loop from basecamp to nearby wildlife refuges - Lower Klamath NWR and the Tule Lake NWR. I went with the intention of checking on the winter conditions at the refuges and counting the number of wildlife spotted.
Today I counted:
Bald Eagles, 15
Rough Legged and/or Red Tail Hawks, 42
Peregrine Falcon, 3
Coyote, 6
Waterfowl: Canadian Geese, Heron
This is a low count for this time of year when compared to the same times in recent years. Sadly, the drought has left the refuges dry with the only major water area located near the far southern end of the Tule Lake NWR near the east entrance of the Lava Beds National Monument.
I also had the opportunity to visit the petroglyphs located south of Newell, California. The petroglyphs are ancient rock carvings along the edge of a former lake bed. The area is managed by the Lava Beds National Monument.
Additional Material
Additional material such as our Relive videos and Gaia GPS tracks are available to our Patreon Family.
For as little as $1/month you can help us tell the stories of our overlanding adventures and as a thank you, you receive special bonus content with extra videos and our GPS tracks.
Photography


Christmas Snow
The weatherman was right this year, we did get snow for Christmas after all. About 4-6 inches fell at base camp overnight with nearly a foot this week. There is another storm that will continue for a few more days. Hopefully, this will dump plenty in the mountains and make for some good winter adventures and possible snow camping opportunities.
The weatherman was right this year, we did get snow for Christmas after all. About 4-6 inches fell at base camp overnight with nearly a foot this week. There is another storm that will continue for a few more days. Hopefully, this will dump plenty in the mountains and make for some good winter adventures and possible snow camping opportunities.
![Custom-built roof rack made of strut [part 1]](https://images.squarespace-cdn.com/content/v1/67254a4d801eee466b8a2c68/1730497106815-STYW6TYSRUFLPD4QQ0Y2/rail.jpg)
Custom-built roof rack made of strut [part 1]
A few weeks ago I found an unbeatable deal on an awning through Napa Auto Parts of all places. The eight-foot awning by Maxi Trac was a steal at $99.99 + shipping. I quickly placed an order and waited for it to arrive. After it arrived I quickly learned that …
NOTE: This is my take on building a custom roof rack for a 2009 Chevrolet Suburban. This is by no means a complete list of step-by-step instructions. But a summary of what I did to complete the project. Links to parts, tools, and ideas from YouTube are included below. This build is not sponsored by any of the linked companies or brands. Items and tools used in the build were not donated by brands. I did purchase all of the items with my own money.
Installed passenger rail of a custom roof rack built with Superstrut on a 2009 Chevrolet Suburban. Click to enlarge. (Image: Brian Gailey)
A few weeks ago I found an unbeatable deal on an awning through Napa Auto Parts of all places. The eight-foot awning by Maxi Trac was a steal at $99.99 + shipping. I quickly placed an order and waited for it to arrive.
After it arrived I quickly learned that the factory roof rack was not going to work for mounting the awning. Sure, I could rig it but I also did not want to risk it flying off at 65 mph on the highway. So, I began researching a way to update the roof rack.
I first thought of buying an aftermarket kit. But after seeing the prices for roof racks and platforms I quickly tossed that idea out of the window.
Then I remembered watching Donald from Softroading the West mention he modified his roof rack on his Subaru Forester with Superstrut in a video from 2019 (Donald later uploaded a video about a Superstut roof rack on a Nissan Frontier). I then asked myself, “why can’t the entire rack be constructed from Superstrut material?” With no logical reason not to, I began measuring and collecting parts for the custom build.
Strut material is relatively inexpensive and assembles like an erector set. However, the assembly brackets and pieces can add up quickly if you are not careful. It can be as little as $20 for a ten-foot piece of strut but $7 for a right-angle bracket. The great part about this build is it can be as simple or as complex as you like. Overlapping strut pieces can help keep the cost down, but if you desire a sleeker look with more brackets the price can increase.
Disassembly
The old and tired factory roof rack was held on with a dozen T-25 star-patterned metric Torx bolts. Most of them came out easily enough. However, I found that the factory rivnuts were rather tired. Three spun loosely in the roof and another two had wollered out the holes so much that they were no longer attached to the roof at all. For this custom rack to work, I must remove and replace the factory rivnuts.
Luckily, I found a rivnut tool locally ($44.99, Harbor Freight) the tool even came with an assortment of rivenuts too.
I opted to go up one size on the bolts/rivnuts. This required drilling out the old rivnuts, drilling a slightly larger hole in the roof and replacing them with new rivnuts. I believe we went from 6mm to 8mm on the bolt diameter.
Now that the roof rack was off, and new rivnuts were installed, I added a small amount of silicone to each nut to reduce the risk of forming a leak.
Assembly
Disassembly of the old system was simple and straightforward. Assembling the new rack came with several choices. From the length of the runners the spacers used to mount them; paint finish to brackets & hardware. I decided to go with what worked best for me.
I knew I wanted to remount my eight-foot-long Yakima TopWater cargo box, add a storage basket, and install a larger solar panel. So I decided to keep the runners at the full length of ten feet. This also made making the math easy for the stringers that run across from rail to rail at approximately twenty inches.
Looking at the factory rack, there are molded plastic spacers clipped onto the rails to give it a bit of protection to the roof & paint from the rails. I wanted to do something similar to protect those areas in the custom build. I first tried using a rubber floor mat cut to shape. Unfortunately, the rubber proved to be too soft to tightly secure the rails to the roof. In some cases, when tightening the bolts on the rails, I pulled the rivnuts up into the rubber. Nearly pulling the new rivnuts right out of the roof.
Back to the drawing board on the spacer.
I used a lifeline and phoned a friend in the auto collision industry. Together we decided HDPE plastic would be the way to go on the spacer. This is not something normally stocked in a home improvement store. Amazon has a selection of sheets but I wanted to get my hands on it first before blindly ordering. Doing some research, HDPE plastics are often found in commercial applications as a protector against metal fatigue. Its also found in commercial kitchens as cutting boards.
Cutting boards!? That was a lightbulb moment.
I went down to a local restaurant supply store and sure enough, they had sheets of multiple-sized 1/2” thick HDPE cutting boards. One happened to measure 18”x12” perfect size for all the pieces I wanted (2”x12” spacers).
Bonus, the cutting board was about $15. Pieces on Amazon were much more expensive.
I used a circular saw with a blade made to cut plastics and simply ripped the large piece into the two-inch-wide pieces I needed.
Using a pencil and speed square, I marked out holes that lined up with the existing rivnuts on the roof. A drill and sharp bit made quick work on the holes.
TIP: Make sure to countersink the holes on the bottom of the spacers to account for the lip of the rivnut. This way they sit flush against the roof.
Now that the spacers were cut and the rivnuts were in. It was nearly time to mount the rails. But first, I wanted to coat the Superstrut in a black bedliner style material. I went with a rubberized material in hopes of durability and longevity. I picked up Duplicolor Truck Bed Liner ($15, local hardware store) scuffed the galvanized metal finish with an angle grinder fitted with a flap disc, and sprayed away. The bed liner went on easily enough and appears to be holding up, but only time will tell.
Looking back, I believe, I would have been just as happy with flat black spray paint for one-third of the price.
Mounting the rails
The roof of the 2009 Chevrolet Suburban is curved from driver to passenger and slightly from front to back; the strut is straight. This posed a slight bit of a problem. The curve from driver to passenger causes the strut (rails) to angle outwards slightly at the top. [We will deal with this when installing the stringers in part 2.] The curve from the front to back causes the strut to not sit flush on the roof. Fortunately, the plastic spacers along with the newly installed rivnuts and a super hot sunny day helped with this problem.
Direct exposure from the hot summer sun helped by heated the stut, expanding the metal a little, and adding a bit of flexibility to the rail. With the strut sufficiently heated, I began bolting it on; starting in the back and working my way forward. Each sinched bolt brought the front end of the strut closer and closer to the roofline.
TIP: Be sure to add a small dab of removable thread locker to the rail bolts to reduce the risk of them working loose.
I simply repeated this install procedure to the opposite rail and both were installed easily.
More on the build coming in part 2
This makes the end of part 1. In part 2 of the custom roof rack build, we cut, paint, and install the cross members. We assemble the rack using Superstrut hardware. And I will show you how to use spring nuts to best work for you.

Medicine Mountain & the Lava Fire
Everything started peaceful enough, with a beautiful drive from basecamp to the Medicine Lake Campground for an overnight stay. The next day turned into an eventful situation that jerked me out of overlapping and into work in a matter of moments.
Everything started peaceful enough, with a beautiful drive from basecamp to the Medicine Lake Campground in Northern California for an overnight stay. The next day turned into an eventful situation that jerked me out of overlanding and into work in a matter of moments.
Our first stop was just north of the Lava Beds boundary at the start of the auto trail for the Tule Lake NWR. Due to extreme drought conditions in the Klamath Basin, water was diverted from the farms and refuges to support downstream fish. [It’s a long story, Google it]. Because of this, the refuge was dry, and we wanted to see just how dry it was. We both were appalled and saddened, so we decided to move on.
A dry lake bed and small channel is all that is left of the Tule Lake National Wildlife Refuge following diversion of water in the Klamath Basin. June 2021.
There are several ways to reach Medicine Lake on this journey, we would venture through the Lava Beds NM from the north and exit from the west side of the park. Before heading out, we made a quick stop at the park headquarters for a bathroom break and to check out the views.
Following the pitstop at HQ, we traveled out of the park and into the Modoc National Forest. While traversing the backcountry, we used the USFS map layer in Gaia GPS to locate a pinned location - the base of a cinder cone named Cinder Butte. Although we took the long and windy route, we found our pinned location and learned that the area is named Badger Basin.


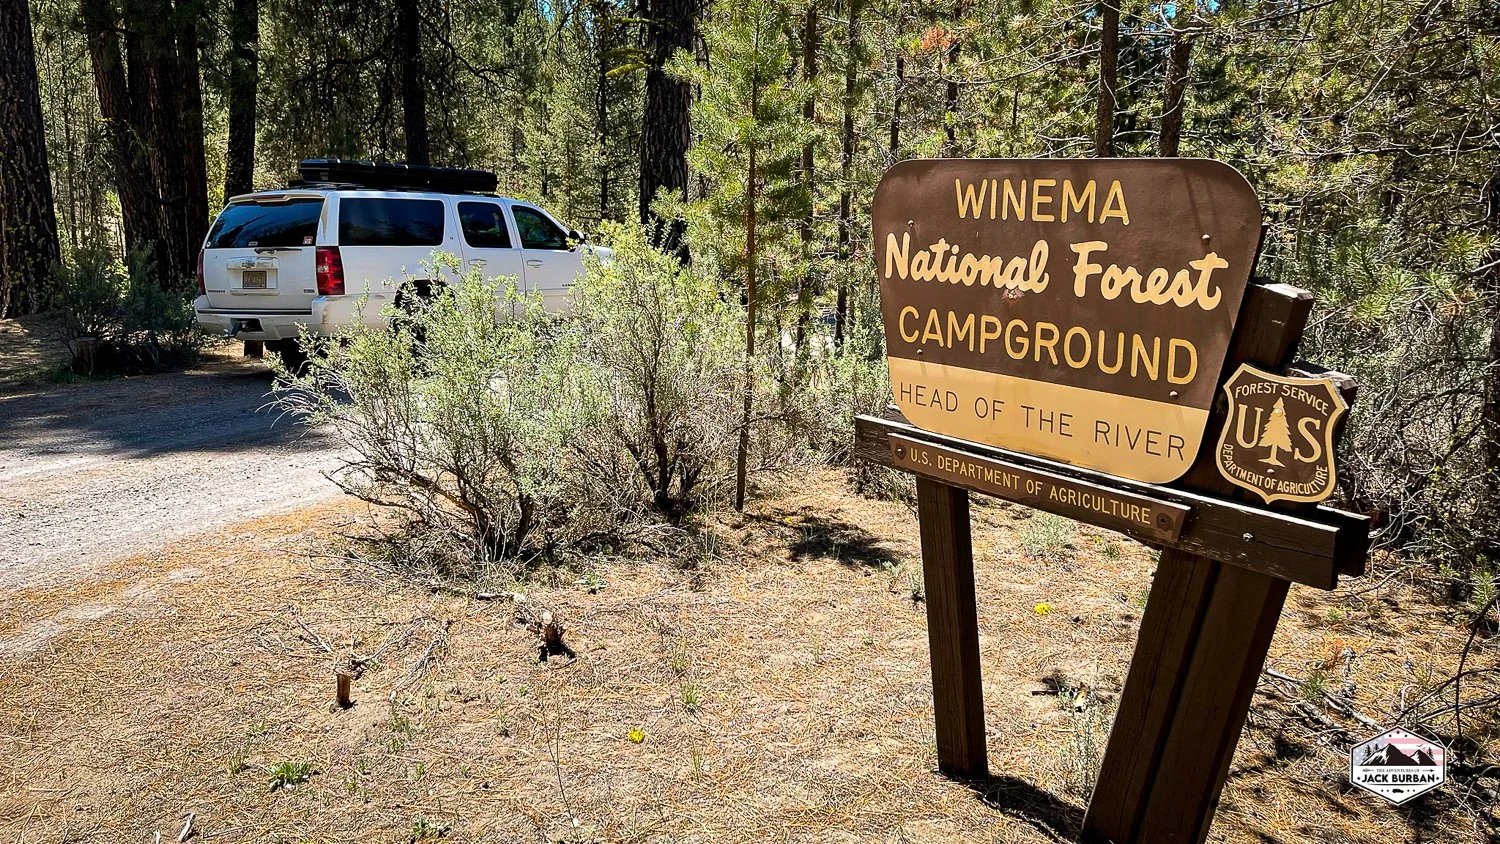
Medicine Lake Campground
After a few photos from Badger Basin, the clock showed it was now after 5:30 PM. We drove a slightly more direct route to Medicine Lake where our reserved campsite awaited; arriving a couple hours later.
Medicine Lake is a beautiful location atop a shield volcano (Medicine Mountain) 6600 feet above sea level. On the north side of the lake are four Forest Service campgrounds and a day-use area. On the southside is a small community of cabins.
Once at the lake, we drove through all the adjacent campgrounds to get a feel of the area before settling into our campsite. To stretch our restless legs, a short hike to the lake was in order, before returning to camp to make dinner. Dinner was simple. Just some jarred spaghetti sauce and some freshly boiled noodles.

Medicine Lake, California.
By this time, the sun had gone down and the air was cool, much cooler than back at base camp. Overnight temperatures were quite comfortable.
The next morning, we woke to the sounds of bluebirds in the trees above with the occasional cry of a magpie.

Awakened by nature, it was time for coffee and breakfast. Like the night before, breakfast was simple. Just a bowl of cereal.
Camp was soon packed and we were back adventuring by mid-morning.
With no real destination in mind, as the campsite was our only true destination on this trip. We headed out of Medicine Lake Campground and went westward toward Little Mt. Hoffman Lookout. We hoped to reach the lookout to see views of the Medicine Mountain area.
Unfortunately, we were met with a gate about a mile below the summit.
Disappointed with the gate, we continued on toward Little Glass Mountain, a beautiful obsidian lava flow.
The lava flows at and near Little Glass Mountain were stunning, and dotted with great little boondocking campsites. Soon we found ourselves off the dirt roads and on a paved Forest Service road that lead toward California Highway 89.


Once on CA89, it was mid-morning. Checking the map, we spotted three waterfalls to visit; the upper, middle, and lower falls of the McCloud River. We started at the lower and worked our way upriver.
Lower McCloud River Falls was very busy. The parking lot was full of cars. Many people were enjoying the area, including a few people fishing in the plunge pool. Next, we stopped into Middle McCloud River Falls and the Upper Falls areas.
Each waterfall is beautiful in its own right and easy to access.
The Middle and Upper Falls were not as busy as the lower falls but still crowded.


From here we popped into the little town of McCloud for some fresh ice for the cooler and kept moving on.
Leaving McLeod our adventure would next take us to Lake Siskiyou and Castle Lake west of Mt. Shasta City. In my opinion, some of the best views in the Siskiyous can be found at these two lakes.
Mount Shasta and smoke from the Lava Fire as seen from Forest Service road 42N15. 24-hours later this area would be burned by the Lava Fire.
Lava Fire
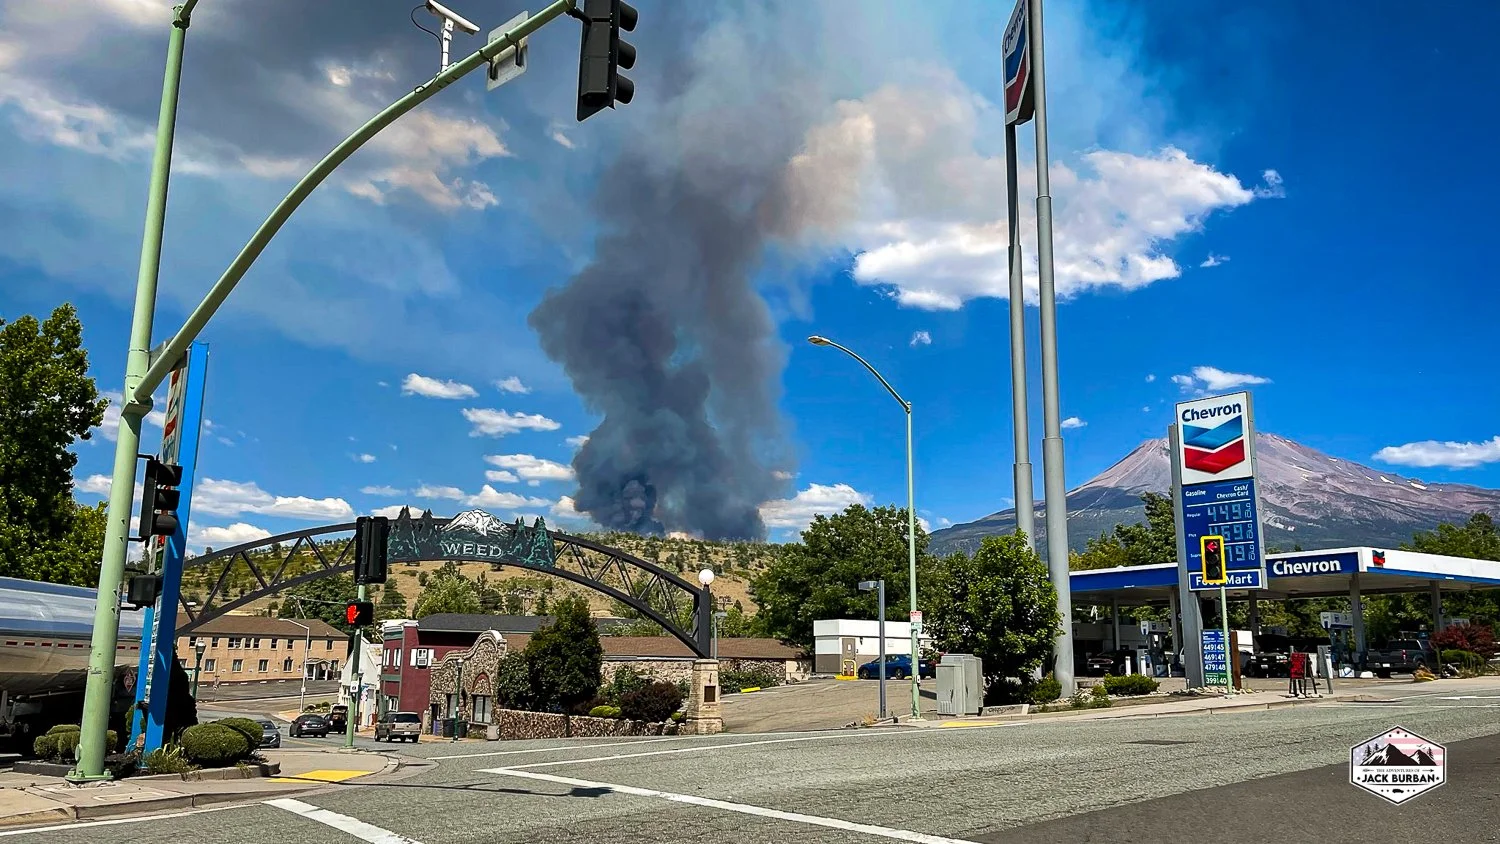
Returning toward Interstate 5 is when we noticed smoke from the newly ignited Lava Fire and our little trip was cut short and my occupation called me to work to report on the Lava Fire.

Smoke from the Lava Fire rises in front of Mount Shasta, California.
For those who do not know, I own and operate a small local news brand called Klamath Falls News. Part of Klamath Falls News is Cascade Firewatch, a regional wildfire news brand. Cascade Firewatch covers Northern California (north of Redding/Chico) and Southern Oregon (south of Eugene/Bend) from the Warner Mountains in the east to the Pacific Ocean in the west.
What we did know, is this fire was in a beloved part of Northern California. What we did not know was just how devastating this fire would become and how it would be the beginning of several huge area wildfires. But that is another story.
We traveled up to Weed, California, just a few miles from the fire. I checked in with my wildfire contacts and a few colleagues to see what they knew. Because the fire was new, collectively we did not know much.
We traveled around Weed to find a few good vantage points but ultimately went to a spot off of US Highway 97 at USFS Road 42N15. A beautiful place where we had camped before. Little did we know, just a few hours later, the fire would turn and toast this area.
Feeling the urgency to get back home. We pulled the plug on this trip and decided to try again another time.
GPS Track
Patreon Family
For as little as $1/month help us tell the stories of our overlanding adventures and get special videos and our Gaia GPS tracks. https://www.patreon.com/jackburban
Additional Photos


Williamson Headwaters
An overnight solo excursion started out with dinner on the Nylox Ridge alongside Upper Klamath Lake in Klamath County, Oregon with no real destination in mind. Little did I know, I would end up right back where I started.
Dinner was simple, just some grilled chicken with cheese.
DETAILS
Location: Klamath County, Ore.
When: June 2021
Stops: Diamond Lake, Klamath Marsh, Williamson Headwaters, Applegate Butte
An overnight solo excursion started out with dinner on the Nylox Ridge alongside Upper Klamath Lake in Klamath County, Oregon with no real destination in mind. Little did I know, I would end up right back where I started.
Overnight parking accommodations.
Just a few miles from basecamp and too early to bed down, I left the ridge and traveled north. With the hopes of finding some night photography landscapes to photograph. I tried all the usual suspects (click here to see some of my previous work) but did not find anything different or inspiring from the past.
I ventured through the Wood River Valley and Crater Lake before finding myself along the shores of Diamond Lake. Still unable to find anything great with the Milky Way, I was going to call it a night along a pullout near the dam. Unfortunately, another traveler had the same idea. I then ventured over to the overflow parking of the resort for a few hours of shuteye. It was about 3:00 AM when I laid down for the night.
The next morning. I awoke to a beautiful sunrise over the lake. Mount Bailey was glowing and the marina was busy. It just so happened to be the first day of fishing season on the lake.
The marina of Diamond Lake Resort looking to Mount Bailey.
After a quick cup of coffee and a visit to the bathroom (maybe not in that order), it was time for breakfast. I did not want to cook in the resort so I went a few miles south to the South Shore Day Use Area to whip up some ham and eggs.
Full and caffeinated, I broke down from breakfast and left the mountains for the Klamath Marsh.
After arriving at the marsh, I settled on a destination. A place, I have never been to before. The headwaters of the Williamson River. This was about 75 miles from camp and would take the better part of the afternoon to traverse. The difficult roads were not difficult, just extremely dusty - with a section or two with loose cinders.
Along the way, I found a old cinder pit and captured some unique photos.


It was much hotter in the valley than it was up on the mountain and extremely dry, but beautiful.
After arriving at the headwaters, I parked next to the sign and walked 50-yards or so to see the water bubbling up out of the ground. Like many large river systems, this headwater bubbled up out of the ground over a large stretch before forming a pool nearby. That pool then feeds the Williamson River on its path for Upper Klamath Lake.

Headwaters of the Williamson River in Klamath County, Oregon.
After an hour or so of exploring, it was time to move on. I had pinned a nearby fire tower site on Applegate Butte. So that site was next on the list.
Another hour or so later, I was at the top of the butte with views looking toward the Klamath Marsh in the north. The butte was pretty overgrown so not much else could be seen, with the exception to some communications towers and buildings.
The old fire tower was long gone, but the concrete footings remained.
By this time it was getting late in the day and it was time to once again return back to basecamp.
Patreon Family
For as little as $1/month help us tell the stories of our overlanding adventures and get special videos and our Gaia GPS tracks. https://www.patreon.com/jackburban
Additional Photography


1,900 Mile, 9-day shakedown trip
A shakedown trip is usually held close to one’s home or base camp. The purpose is to learn about one’s rig, supplies, gear, etc while close to home before adventuring too far out. That way if something goes wrong, an adventurer is near home base allowing for an easier return if necessary. I did not do this.
A shakedown trip is usually held close to one’s home or base camp. The purpose is to learn about one’s rig, supplies, gear, etc while close to home before adventuring too far out. That way if something goes wrong, an adventurer is near home base allowing for an easier return if necessary. I did not do this.
Feeling the need to escape, I decided to do just that. I went out solo with no real destination or itinerary.
I drove from basecamp west to the Rogue Valley of Oregon where I camped out on a side street, in a commercial neighborhood, in the rain.
Waking up the next morning, I visited the Black Bird, an outdoor and adventurists retail paradise. After strolling the bird, I opted for a drive up to the top of Mt. Ashland. An hour later, discouraged and unable to find a parking spot from the crowded ski area, I left. Heading back down the snow-covered mountain.
Once reaching Interstate 5, I pointed Jack north and kept driving until I could not go any farther. A couple of days later, I dipped my toes into Canada.
I returned back to basecamp via the Washington coastline before cutting inland at Astoria.
Overnight quickie
After returning home from my solo adventure. Crystal wanted to head out for a quickie. We opted for a drive from base camp through the Siskiyou Mountains of Northern California before taking the long way back.
We saw some incredible landscapes, many we should have not had access to in the middle of winter. Such as CA-3 across Scott Mountain. But the winter snows had been mild and allowed for some on pavement adventures that would normally be closed for winter. After traveling up and over Scott Mountain we rounded by Trinity Lake before ending up at a truck stop in Redding for the night. The next morning we grabbed a quick drive through breakfast and caffinated up at Dutch Bros before heading north to Medford and a special stop at the Black Bird.
What I learned
Along the way, I camped out at truck stops, Cabella’s, rest areas, and casinos. Travel was fun, exciting, and adventurous. Best of all, I learned a few things along the way. Here are nine things I learned on my nine-day adventure.
The custom-built platform I made is too tall, there is not enough headroom in the bed area. I want to be able to sit crisscross applesauce without hitting my head.
I can get by with a shorter bed than previously thought. This frees up some extra space. But Jack needs specific storage for larger items. Cargo box?
A near 200-mile daily travel average is way too many miles.
After sticking my toes across the border, I cannot wait to further explore Canada.
Even in the rain in winter, the PNW has a lot to offer.
Truck stops are not as friendly to cars that wish to overnight park as they are to semi-trucks. Yet, Cabela’s and Bass Pro Shops are friendly to car travelers. Casinos are also limiting overnight parking due to COVID.
Truck stop showers are beautiful.
Truck stop fuel prices are typically better than standard fueling stations.
Traveling alone is not lonely. But traveling with a companion is more enjoyable.
Various photos from the adventure


We're Overland Bound
One of the first groups I found while in the early stages of planning our overlanding rig was Overland Bound. OB is a club of like-minded, adventure-driven, outdoor enthusiasts that have formed a community and forum for sharing ideas, trail rides, meet-up, and so much more. I knew after finding this group that once we found our ride, we were destined to become members.
One of the first groups I found while in the early stages of planning our overlanding rig was Overland Bound. OB is a club of like-minded, adventure-driven, outdoor enthusiasts that have formed a community and forum for sharing ideas, trail rides, meet-up, and so much more. I knew after finding this group that once we found our ride, we were destined to become members.
We may not be highly active in the forum, but we sure do appreciate the community nonetheless.
If the community was not enough, there is an app too. OB1 is an app that members can use to find trails and campsites near their location.
There is also a YouTube Channel run by Michael the founding member of Overland Bound.
This post may sound like an advertisement for OB and in a way it is. But it is not a paid advertisement, OB did not ask me to write this, nor do they know I am writing this up. I am just a happy member sharing his club. If interested check out the links throughout the post.
If you are an OB member, leave a comment below with your number and let us know how you like the club and how you found this blog post.
See you on the trail.
Find Jack on Overland Bound - https://overlandbound.com/forums/members/jackburban.66071/

‘Camperburban’ Platform Build
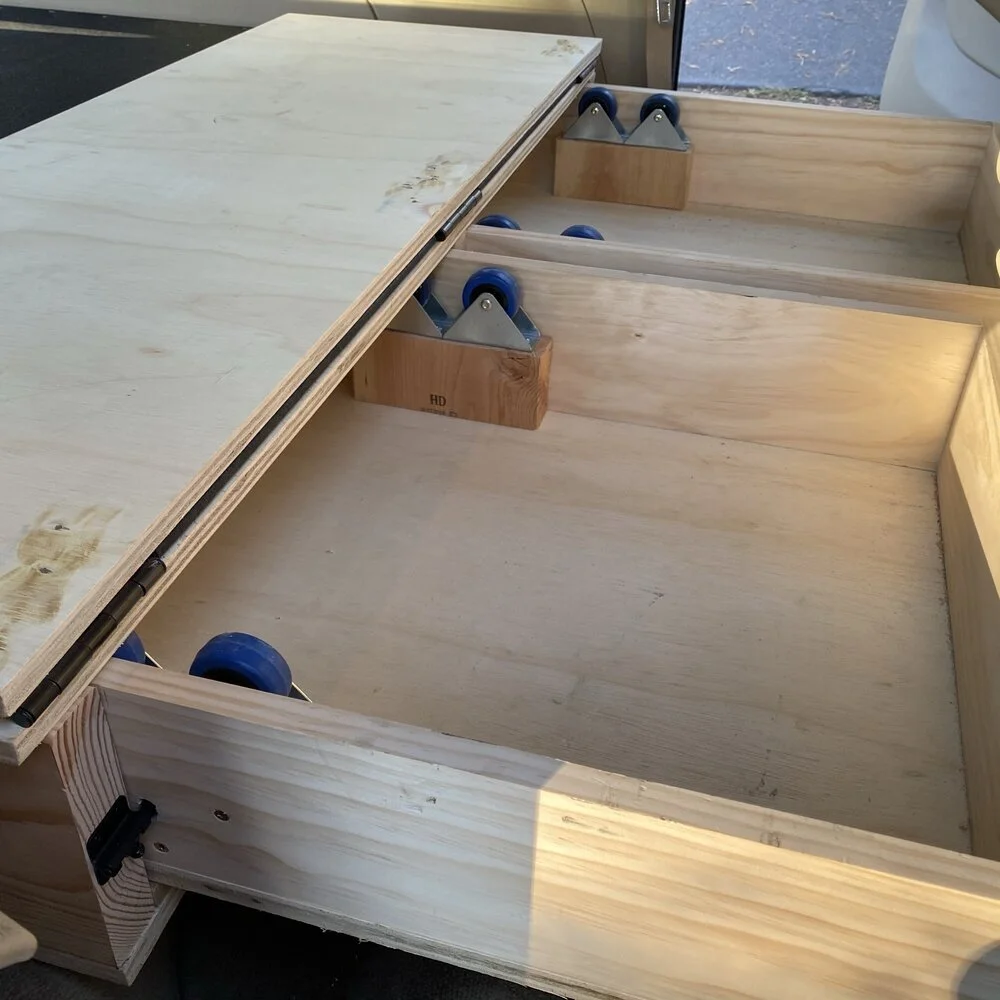
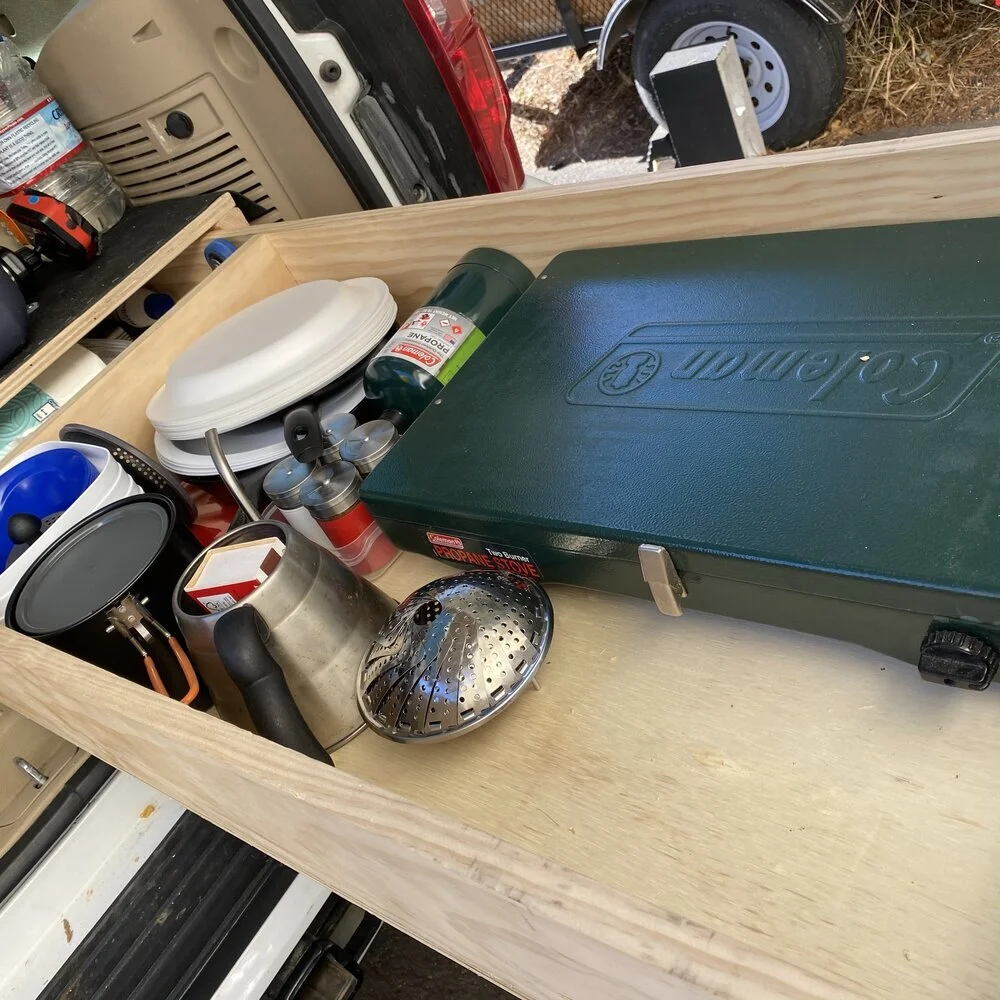
The platform is the base of the entire interior “camperburban” build. I kept the construction very simple it is basically a box with two drawers sitting on ball bearings. All the building materials I sourced from Home Depot, Harbor Freight, a local hardware store - Diamond Home Improvement, and a few items off Amazon.
DISCLAIMER - This is not a how-to build of the platform but rather an explanation of what I did that worked for me personally. Please feel free to use this as inspiration for your own build.
The platform is the base of the entire interior “camperburban” build. I kept the construction very simple it is basically a box with two drawers sitting on ball bearings. All the building materials I sourced from Home Depot, Harbor Freight, a local hardware store - Diamond Home Improvement, and a few items off Amazon.

Image caption
For the wood I used:
3/4 inch sanded birch plywood for the top and bottom of the box and bottom of the drawers
2x8 inch construction grade Douglas Fir beams as the vertical supports
1x2 inch strapping I had leftover from another project
1x6 inch select grade pine for the drawer sides
For hardware, the kit is extra basic
1 1/2 inch wood decking screws
36 inches of 2 inch by 1/8 inch thick metal plate. This was bent into an “s” shape and used to bolt the front of the box to the rear seat mounts
Two stainless steel turnbuckles (Amazon) to secure the structure
Two stainless steel 8mm ring bolts (Amazon) to mount the turnbuckles
Two lag screw hooks to mount the turnbuckles
1-inch roller bearings & 2-inch casters from Harbor Freight as makeshift drawer slides
Two 2-inch D-ring loops for strapping the cooler
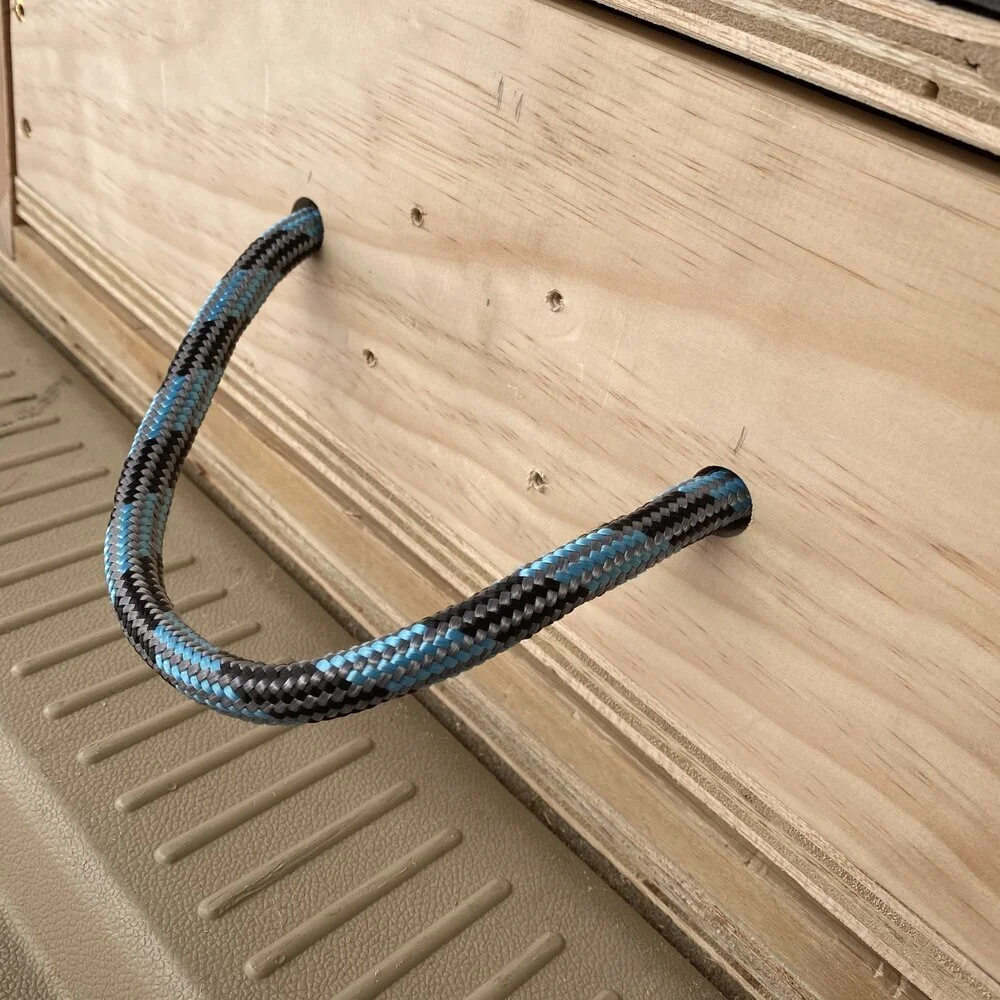
Gate handles - I opted to swap these out for simple rope loops for handles. The gate handles worked great but was loud as they shimmied when Jack was in motion.
Door hinges for the extension flap
Barrell bolt latches for locking the drawers closed
14 feet of 24-inch wide rubber mat
8 cans of Rust-Oleum flat black spray paint
2 cans of Rust-Oleum satin clear coat
Looking at this I am sure you have questions, let me see if I might be able to answer a few.
Why did you not use drawer slides?
I chose not to use traditional drawer slides as I wanted the drawers to slide through the platform. Slide back out the tailgate and forward into the cab. It is the forward slide that the 24-inch flap-folds onto to support the full-length mattress.
Do you have plans or blueprints for the build?
No, I do not have a set of plans for this build, nor do I have step-by-step instructions on how to construct the platform. What I do have is a large number of photos from the construction of the project. Feel free to browse through the photos for inspiration for your own build.
What mattress do you use?
I first purchased a full-sized 8-inch cooling gel mattress off Amazon on Prime Day. This mattress was extremely comfortable but it was just too tall. There was not much headroom left when laying on the mattress. I ended up selling that privately and ordering a full-sized 4-inch tri-fold memory foam mattress instead. I have not yet (as of the time of writing this) slept on this mattress yet. However, it fits the vehicle much better and provides an extra 4-inches of clearance versus the previous mattress.
If you have any other questions not answered above feel free to ask in the comments below or check the FAQ you might find what you need there too.


Topsy Grade Road
Topsy Grade Road runs on BLM lands; with the northernmost point at Oregon Highway 66 and the Klamath River (JC Boyle Reservoir). From there the road heads south along the eastern side of the Klamath River Canyon before dipping inside the canyon about 9 miles in.

The Klamath River Canyon as seen from Topsy Grade Road (Image: Brian Gailey)
Topsy Grade Road runs on BLM lands; with the northernmost point at Oregon Highway 66 and the Klamath River (JC Boyle Reservoir). From there the road heads south along the eastern side of the Klamath River Canyon before dipping inside the canyon about 9 miles in.
On Sunday (11/29/2020) we traveled down Topsy Grade Road before connecting to Dorris Road to head into Dorris California.
Weather conditions were sunny but cold, temps in the mid to low 30’s; dropping into the 20’s after the sun set.
Road Conditions
The first few miles were pleasant, with the usual washboard sections and potholes. The road was mostly gravel and paved in a few places and had a small amount of snow along the highest points. Near the 4.5 mile mark the road became mostly dirt with a top layer of surface mud a few inches thick. But the mud froze up after mile 10.
Sunset from approximately the 6 mile mark of Topsy Grade Road
At approximately the 8.5 mile mark the road became a chunky rocky washout as the road wined down into a creek bed adjacent to a marshy area. Shortly thereafter, the road splits - one side heads southwest down into the canyon the other southeast toward Dorris, California. The roads from here were frozen mud, snow, and a bit of gravel before hitting tarmac closer to town.
My Thoughts
I believe the drive is a great one to take for an afternoon escape. The road is decent but a 4x4 or 2wd high clearance vehicle would be necessary for the potholes and chunky rocks. I would not recommend this road for cars, sedans, or coupes.
However, I do not believe 4x4 would be a requirement on a dry summer day, but with mud or snow covered conditions like we experienced, 4x4 is a great help.
There were several potential campsites along this route where a vehicle could pull off for the evening. Many even had rock fire rings and views into the canyon too.
This is a good entry level route. I would recommend this track for anyone looking to get started overlanding, anyone just looking for a leisurely excursion, or for a public lands dry campsite to get away.


New tires installed, BFG KO2's
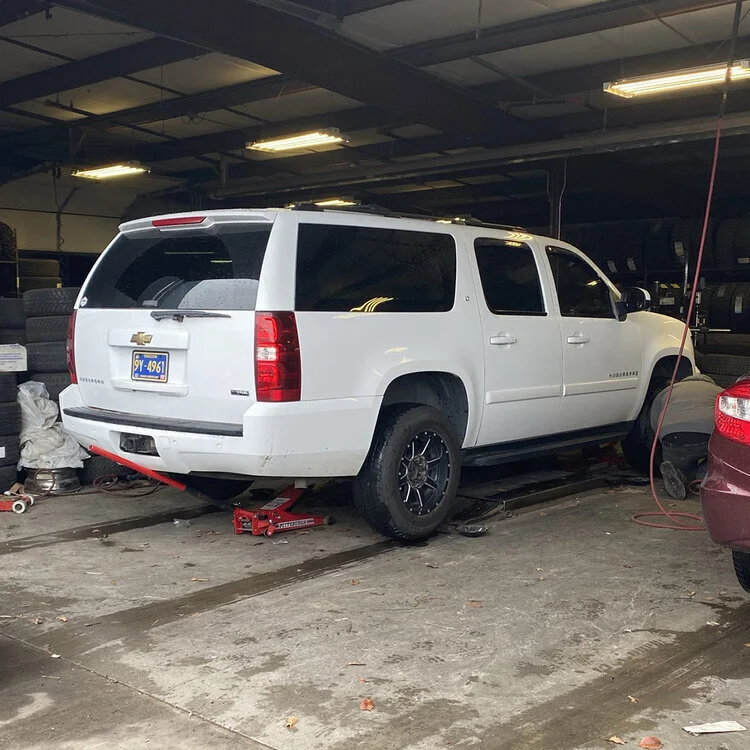
I could not be happier with today’s purchase and upgrade for Jack. I finally pulled the trigger on the BG Goodrich T/A KO2’s after months of going back and forth between them and the Toyo AT III’s.
I could not be happier with today’s purchase and upgrade for Jack. I finally pulled the trigger on the BG Goodrich T/A KO2’s after months of going back and forth between them and the Toyo AT III’s.
At our local tire dealership I opted to go with the LT275/65R18 on Jack as, for now, I want to keep my suspension and tire size as close to factory as possible. The new tires are roughly 32” tall and 10.8” wide. This size will be more than comparable for the types of trails I plan to hit in the near future.

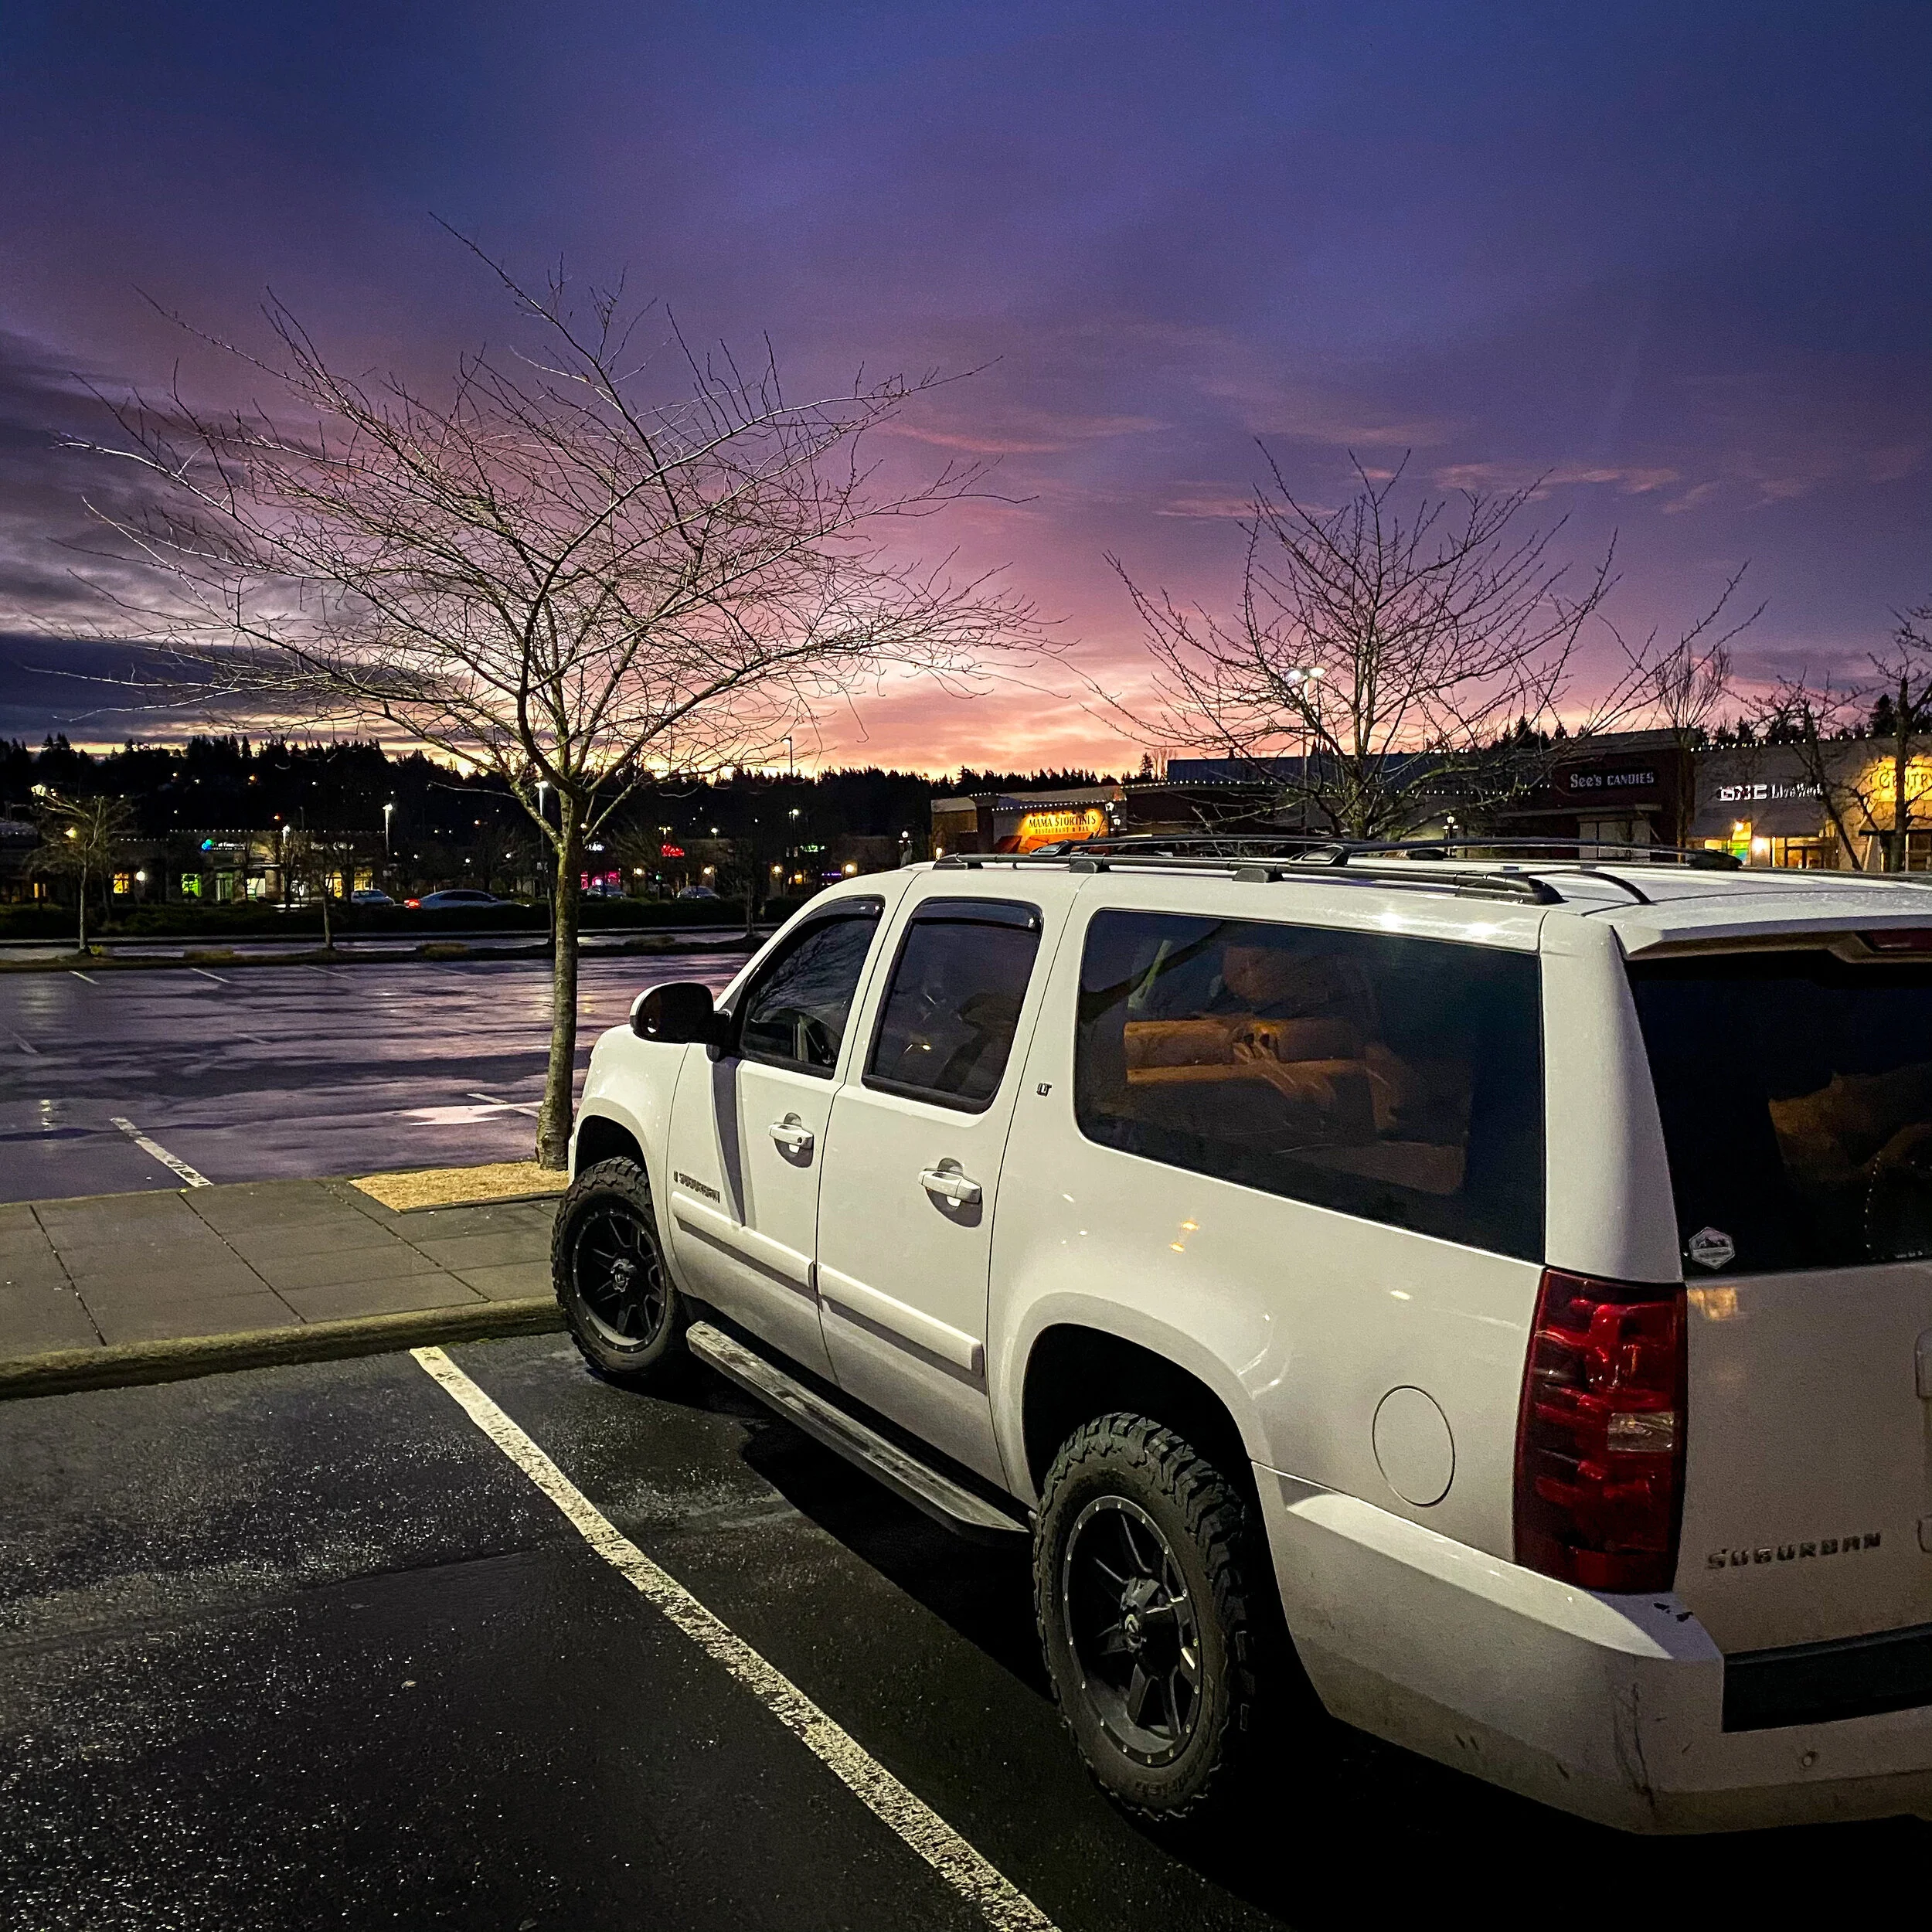
Jack sporting new shoes, BF Goodrich A/T KO2
I have already put the tires to the test on a few local trails and in snowy conditions. So, far they are working great. I plan to do a full review once I have about 10,000 miles on them.


Windigo Pass, Oregon
Located on the northern border of Douglas County and Klamath County in Oregon is a beautiful mountain pass that connects the Cascade Lakes of Lemolo and Crescent. Both lakes are beautiful, serene, and peaceful. The dirt road that connects the two is magnificent in its own right.
Located on the northern border of Douglas County and Klamath County in Oregon is a beautiful mountain pass that connects the Cascade Lakes of Lemolo and Crescent. Both lakes are beautiful, serene, and peaceful. The dirt road that connects the two is magnificent in its own right.
The highest point recorded by Gaia GPS on our travel over the pass was 5,786 feet. We recorded 31.6 miles of track and took us 95 minutes to traverse the moderately easy road.
The road is surrounded by beautiful pine and fir forest. With several hiking trails including the Pacific Crest Trail crisscrossing the roadway.
There was even a beautiful hidden gem of a clear pristine pond on the north side of the road at Bradley Creek. A perfect location for a boondocking campsite for a campervan or truck.
Road Conditions
We traveled across the pass in early October with no recent moisture or snow. Most of the entire roadway was in great condition. Leaving the area near Lomolo Lake to the summit was excellently maintained gravel Forest Service road. The next few miles coming down from the summit the gravel turned to dirt and some minor ruts appeared in the road. Suggesting that the road may be muddy and slippery in wet conditions.
The last few miles before connecting to Crescent Lake Road were extremely dusty. The groomed gravel roadway was long gone and turned into a dusty powdery mess. Once on Crescent Lake Road, we were back to pavement.
With experience, this route could be traversed by passenger cars in addition to pickups and SUVs alike. Please use caution on this route if you have an RV or are towing as some of the corners are sharp and on the north side of the summit the ruts are a bit deep. Also, use caution if you are traveling this route when conditions are wet or snowy as this can drastically change the road surface.
Please note that Gaia GPS shows this roadway as Cascade Lakes Highway - it is not a highway but a gravel and dirt Forest Service roadway (NF-60).


My Thoughts
In the summer, Windigo Pass is a great and easy softroading trek. If the conditions are wet, I can imagine this route being a bit challenging for a noob. Experienced overlanders will have no trouble with this mountain pass. If you love lush forests you will love this route. Although we did not see any critters on this trip, I would expect the mountains to be full of deer and elk, smaller game, and even a few predators like black bears, cougar, and a traveling wolf pack.
I would recommend this trail to all softroading and overlanding skill levels.

The Birth of Jack
Several years ago, my wife and I decided that our end goal was to live out of a vehicle and travel throughout the United States, Canada, and Mexico. We had no idea what we wanted to live out of - a van, motorhome, or travel trailer. What we did know is that we wanted a 4x4 for off-pavement capabilities and we wanted to experience more of Mother Nature than just what is along the interstates and highways crisscrossing the continent.
Several years ago, my wife and I decided that our end goal was to live out of a vehicle and travel throughout the United States, Canada, and Mexico. We had no idea what we wanted to live out of - a van, motorhome, or travel trailer. What we did know is that we wanted a 4x4 for off-pavement capabilities and we wanted to experience more of Mother Nature than just what is along the interstates and highways crisscrossing the continent.
After searching for months we could not find what we wanted. Then like a light bulb it clicked, a Chevrolet Suburban.
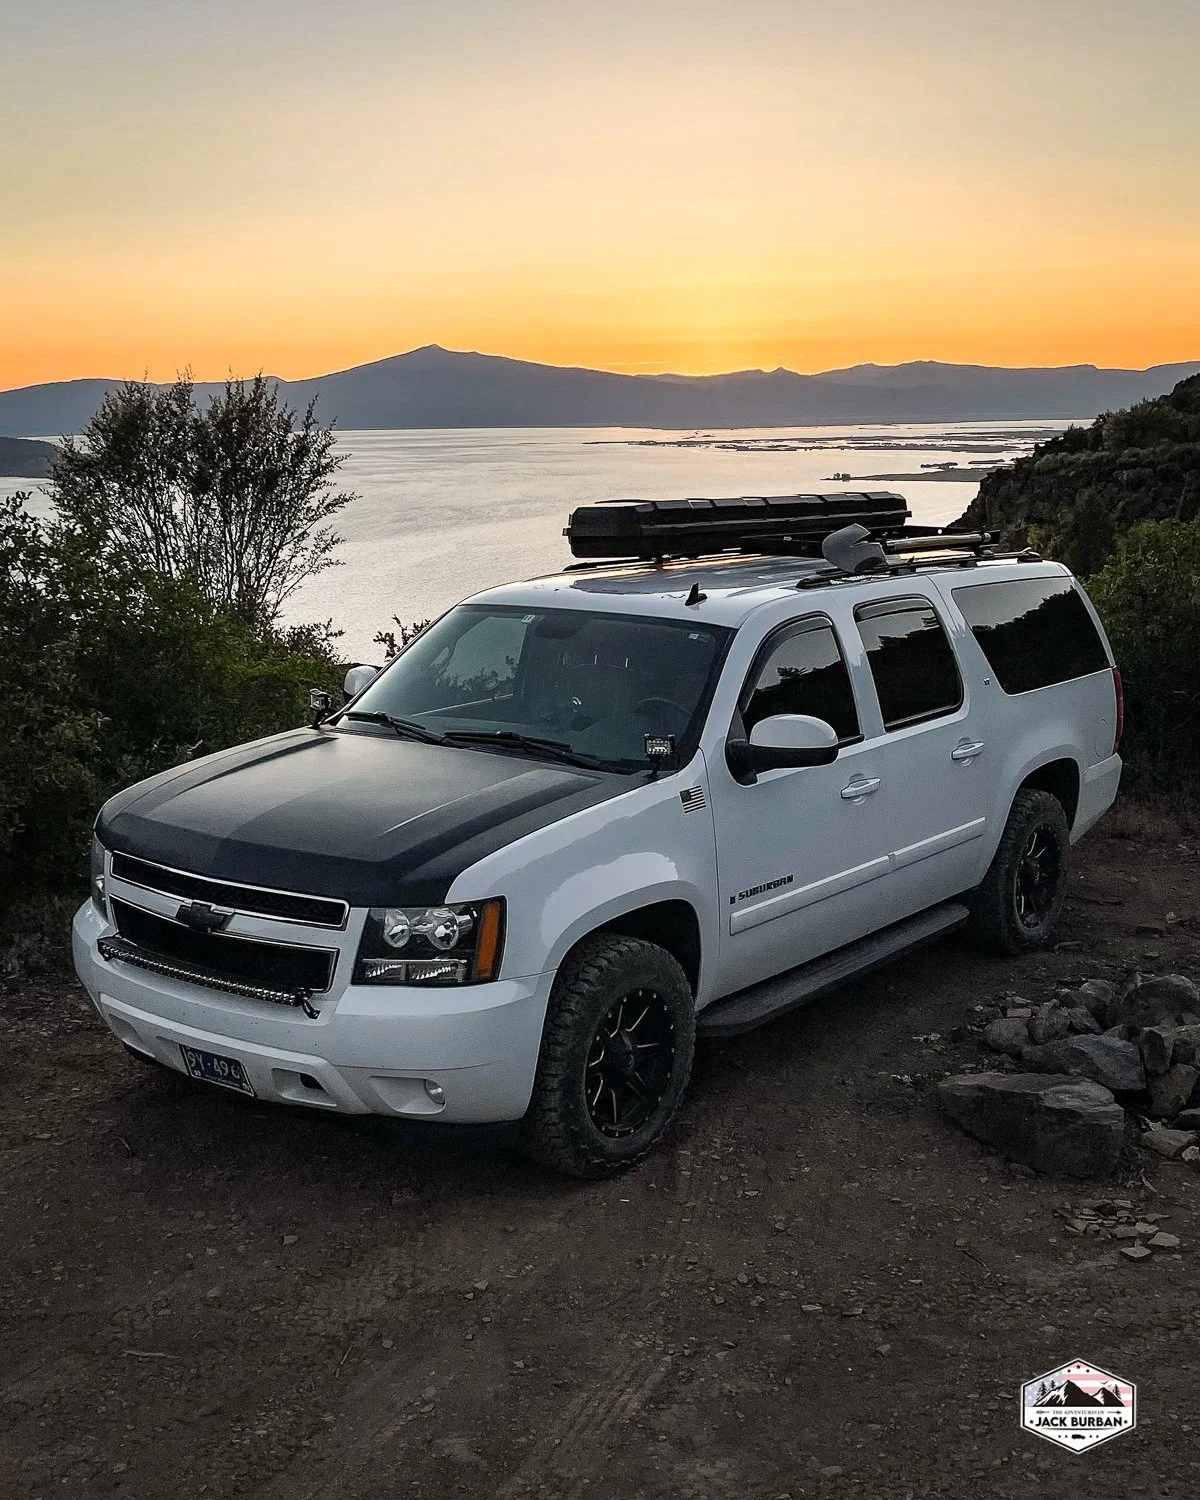
Jack takes in the sunset in Southern Oregon. (Image: Brian Gailey)
Sure a Suburban is not what one might first think of for recreational travel but think about it, they are a solid 4x4 with a dependable drive train that has been in production for decades. They are roomy inside for a comfy bed and can still seat up to 4 people. I can do the build myself, that way I know how to fix it when it breaks. We can have water, a kitchen, and electricity integrated into the build. A Suburban can be lifted, upsized to bigger tires, and includes anything I want it to have. I can make the build as posh or basic as I like. Plus, the biggest in my mind, they are an affordable platform to start a build on.
Dealer photo (Image: Autolane)
So I began searching for a Surbaban that met the needs I wanted. What I did not know was how long it would take to find it. I searched for months and had a laundry list of things that I wanted in the truck. Unfortunately, what I wanted just was not readily available in the used market and what I did find would sell quickly or was in poor condition.
What I did find in my initial search was inspiration from the crew at Suboverland.com with their custom overland builds for Suburbans. When I found these guys, I knew I was on the right path and I wanted to order one immediately. But their conversions were out of my beginning budget.
Inspired I began to search even broader - I was looking in Phoenix, Denver, Dallas, and St. Louis. But still, no luck and I began to get frustrated.
LIKE / FOLLOW / SUB

STICKER MERCH
JACKS BUILD
Curious as to what gear we have in Jack? Check out our rig details page.